
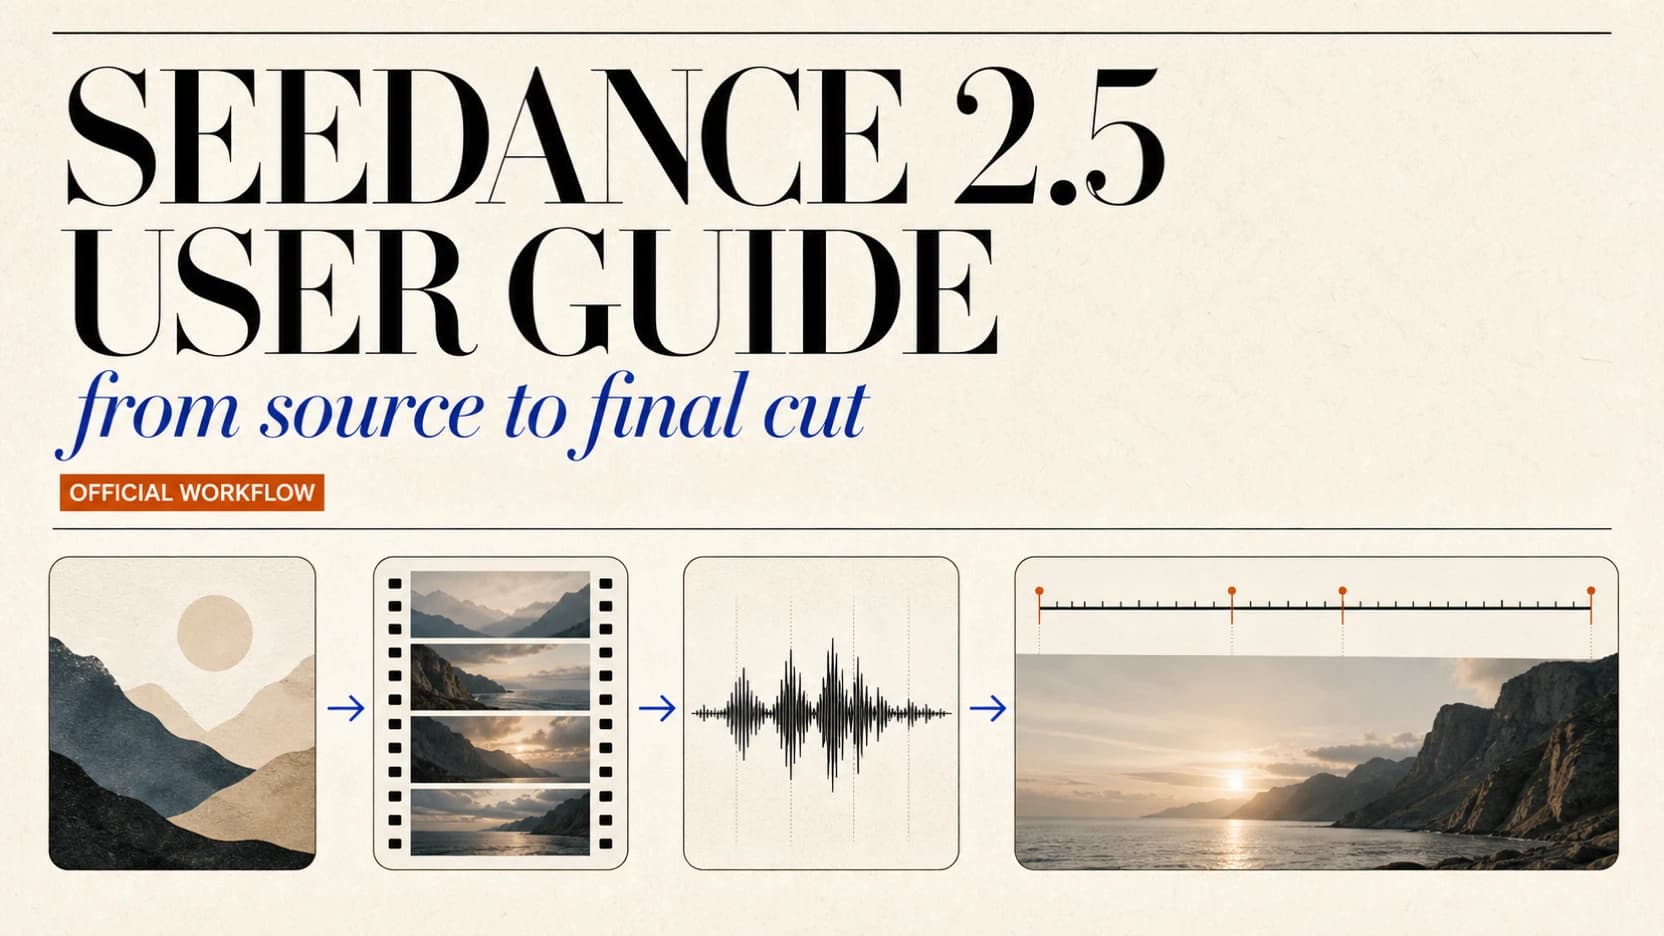
How to Use Seedance 2.5: Complete Dreamina Guide
Use Seedance 2.5 in Dreamina: choose the right mode, prepare uploads, run 30–180-second workflows, use editing tools, and check videos before export.
If you want to learn how to use Seedance 2.5, start with the mode, not the prompt. Dreamina's official guide treats text generation, multimodal reference, Smart Edit, Long Video, and first-and-last-frame control as different production jobs. Each one expects different source material, locks different output settings, and rewards a different prompt structure.[1]
This guide turns those official instructions into a complete working process. It covers every major function listed in the Dreamina Seedance 2.5 User Guide, the upload requirements, 30-to-180-second workflows, language and audio controls, Clay Renderer, green-screen work, storyboard grids, reusable prompts, and a pre-export checklist. It also separates official Dreamina limits from the smaller limits currently exposed by third-party studios and APIs. Seedance2.so is an independent creation platform, not a ByteDance product.
For advanced prompt architecture and complete copy-ready templates, see the Seedance 2.5 Prompt Guide. This article focuses on choosing the right Dreamina mode, using its controls, and completing the production workflow.
TL;DR
- Official access: Dreamina is ByteDance's official consumer creation surface for Seedance 2.5. The official user guide describes the model as fully released in Dreamina.[1]
- Choose the workflow first: use Omni Reference to combine images, video, and audio; Smart Edit to alter an existing clip; Long Video for a direct 30-to-180-second generation; and First and Last Frames when two endpoint compositions must be preserved.[1]
- Build prompts in four layers: material roles, a one-sentence creative summary, a visible plot or timeline, then global requirements and exclusions. This is the structure used in the official user guide.[1]
- Upstream limits are not universal: Dreamina's guide allows up to 30 images in Seedance 2.5, while the companion prompt guide describes an overall ceiling of 50 references, including up to 10 videos and 10 audio files with 30 seconds of each media type.[1][2]
- Use stages before timestamps: divide a long scene into consecutive states, then add exact seconds only to critical handoffs, entrances, exits, transitions, or beats. Timestamp overload can cause rushed actions or omitted events.[2]
- Keep channel names honest: the current Seedance2.so reference workflow exposes up to 9 images, 3 videos, and 3 audio files, not Dreamina's 50-material ceiling. For automation, build against a released model contract and version the future 2.5 upgrade separately.
What Seedance 2.5 does inside Dreamina
Seedance 2.5 accepts instructions through text, images, video, and audio. It can generate a new video, continue an existing one, or edit selected parts of source footage. Dreamina's user guide describes 2.5 as longer, more natural, and more responsive to instructions than 2.0, then lists a much broader set of production tools than a basic text-to-video page.[1]
Here is the capability map in practical terms.
| Official function | What it is for | Best starting material |
|---|---|---|
| Base generation | A new short scene from text or references | A scene brief, optional first frame, or a small reference set |
| Omni Reference | Identity, product, motion, camera, voice, ambience, or music transfer | Clearly assigned images, clips, and audio |
| Smart Edit | Replacement, removal, partial redrawing, spatial changes, or audio work | One source video treated as the master |
| Long Video | A direct 30-to-180-second narrative | A stage plan with stable characters and locations |
| Extend Video | New footage before or after an existing clip | A source clip shorter than 30 seconds plus a boundary plan |
| First and Last Frames | A controlled path between two compositions | Two images with matching aspect ratios |
| Multi-keyframe / storyboard | Ordered visual beats without specifying every frame | Separate keyframes or a clean storyboard grid |
| Green-screen editing | Cleaner subject isolation and compositing preparation | A source clip with a clearly described foreground subject |
| Clay Renderer | Turn a Maya or Blender blockout into finished footage | A clean camera-route or blockout render |
| Seamless transition | Connect two videos through a designed visual bridge | Two clips with compatible end and start states |
The guide also calls out more targeted improvements: detaching or removing background music, transferring an idea from references, removing unwanted elements, changing spatial perspective, matching a tonal reference, improving multi-person identity separation, reducing face-swap mismatches, and suppressing irrelevant subtitles or music.[1] You do not need all of these on every project. Pick the smallest workflow that expresses the actual edit.
Step 1: open Dreamina and choose the right mode
Open Dreamina's official AI creation home, enter the video tool, and select Dreamina Seedance 2.5. Product availability and labels can vary by region or account, so the live model picker is the final authority even when a help document shows the feature.[3]
Use this decision rule:
- No source media: begin with text-to-video.
- One opening image: use first-frame image-to-video and describe what happens next.
- Two endpoint images: use First and Last Frames and describe the path between them.
- Several identity, product, motion, or audio references: use Omni Reference.
- An existing video that must remain recognizable: use Smart Edit.
- A continuous piece longer than 30 seconds: use Long Video.
- A finished clip that only needs a new head or tail: use Extend Video.
That choice matters because some settings are locked by the source. In video editing, the output keeps the source aspect ratio and approximately its duration; the guide notes that transition-frame handling can shift the result by roughly 0.3 seconds. In first-frame or first-and-last-frame generation, the first image determines the aspect ratio. In extension, the source video determines the aspect ratio. Those locked values cannot also be overridden independently in the generation page or API request.[2]
Step 2: prepare reference files that the model can distinguish
The official limits are generous, but a large upload count is not a creative strategy. A useful reference has one job. An unnecessary reference adds another object, identity, visual style, or timing pattern that the model may try to reconcile.
Official Dreamina input limits
The two official guides describe the following Seedance 2.5 ceilings and recommendations.[1][2]
| Input | Official Seedance 2.5 ceiling | Practical recommendation |
|---|---|---|
| All references combined | 50 | Use only material that changes a decision in the final video |
| Images | Up to 30, each up to 4K | 1–8 distinct subjects for stable identity mapping |
| Videos | Up to 10, 30 seconds total | 1–5 subjects; 5–10 seconds per subject clip |
| Audio | Up to 10, 30 seconds total | Trim to the exact dialogue, voice, ambience, or music needed |
| Source video for editing | A normal supported source clip | Under 20 seconds and 1–5 edit references for the most stable result |
The user guide's upload table lists JPEG, PNG, WebP, BMP, TIFF, GIF, HEIC, and HEIF image inputs, an image aspect-ratio range of 0.4 to 2.5, dimensions from 300 to 6,000 pixels, an individual file limit below 30 MB, and a 64 MB request-body limit. Its video table lists MP4 and MOV, input from 480p through 4K, a 0.4-to-2.5 aspect-ratio range, dimensions from 300 to 6,000 pixels, 24–60 fps, and a file limit of 200 MB.[1] The live uploader may enforce a narrower rule for a specific mode, so let its validation message override a general table.
Six to eight editing references may still work, but the official prompt guide warns that stability can drop. Nine to twelve character images or six to ten audio/video references can describe more subjects, yet the same tradeoff applies: more material makes correct role assignment harder.[2]
Give every upload one explicit role
Do not ask Seedance 2.5 to infer what an image means. Write the assignment.
Practical template: reference-role map for a courier product shot
A copy-ready prompt that keeps identity, product, scene, motion, and voice references from competing with one another.
Input — complete prompt
MODE: Omni Reference
MATERIALS: 4 images · 1 motion clip · 1 voice sample
SETTINGS: 10 seconds · 16:9 · 720p

[Characters]
@Image 1 defines the courier's face, hair, and body proportions.
@Image 2 defines the same courier's jacket, helmet, and backpack.

[Product]
@Image 3 defines the exact bottle shape, cap, label colors, and material.

[Scene]
@Image 4 defines the rainy convenience-store exterior and sign placement.

[Motion and audio]
@Video 1 defines the bicycle approach, dismount, and camera tracking rhythm.
@Audio 1 defines the courier's voice only. Do not inherit its background music.

[Scene goal]
Create a rainy-night convenience-store product shot with one continuous courier.

[Timeline]
[0-4s] The courier rides into frame from screen-left and stops beneath the store sign.
[4-7s] The courier dismounts, opens the backpack, and removes the single bottle.
[7-10s] The courier turns the bottle label toward camera and says once in the voice
from @Audio 1: {Delivery for the night shift.}

[Count and exclusions]
Output exactly one courier, one bicycle, one backpack, and one bottle.
Keep the bottle label readable. Do not inherit people, locations, or music from @Video 1 or @Audio 1.
For several views of the same person or product, separate images are often more stable than one collage. State that all of those images describe one subject and that the output must contain only one instance. If you use a grid anyway, explain its reading order and exclude the grid lines, labels, and duplicated subject panels from the final scene.[2]
Step 3: write the four-part production prompt
Dreamina's user guide gives a four-part formula for a complete prompt:[1]
- Creative and material description: what each upload controls.
- One-sentence summary: subject, location, event, overall style, and any defining camera idea.
- Specific plot description: the visible sequence, including camera, action, dialogue, sound effects, and exclusions.
- Global supplement or ending: rules that must remain true across the entire result.
The companion prompt guide expresses the creative sentence more compactly as subject + action or event + optional scene + optional visual style + optional camera or cut + optional audio.[2] The two formulas are compatible. One describes the shot; the other describes the complete production packet.
An annotated wildlife-documentary example
The official user guide demonstrates the structure with a red-crowned crane scene. The following original template keeps that teaching scenario but rewrites it as a production brief with explicit material roles, timing, continuity, and a reviewable end state.
Adapted template: red-crowned crane wetland dance
A copy-ready rewrite of the guide's wildlife scenario, with narrow reference roles and explicit action, camera, audio, and continuity instructions.
Input — complete prompt
MODE: Omni Reference
MATERIALS: @Image 1 wetland environment · @Image 2 crane identity
SETTINGS: 8 seconds · 16:9 · 720p

[Reference roles]
@Image 1 defines only the autumn reed bed, shallow water, mist, sunrise direction, and golden-green color palette.
@Image 2 defines one adult red-crowned crane: white body feathers, black flight feathers, red crown, long dark legs, and slender proportions.
Do not inherit extra birds, framing, text, or artificial objects from either reference.

[Creative direction]
Create a restrained wildlife-documentary moment at sunrise. Keep the crane near frame center in a low, eye-level-with-the-water medium shot. Use naturalistic contrast, soft atmospheric depth, and a slight handheld response to the bird's movement without losing the subject.

[Timeline]
0-3s: The crane stands still in ankle-deep water, then opens both wings in one slow continuous motion. The wing movement pushes visible rings across the water; the bird remains fully in frame.
3-6s: The same crane makes one light forward hop, touches down with both feet, and sends a small fan of droplets outward. The camera rises only enough to follow the hop.
6-8s: The crane folds its wings, settles into a tall standing pose, turns its head toward screen-right, and gives one clear call. Hold the final pose for the last half-second.

[Audio and continuity]
Use quiet water movement, reeds in a light breeze, one wingbeat sequence, one landing splash, and one crane call. No music, narration, dialogue, captions, or subtitles. Exactly one crane throughout; no duplicated wings, changing plumage, abrupt lens change, cutaway, or new animal.
The opening paragraph combines material roles with the governing visual idea. The timed paragraphs define the visible plot, and the closing paragraph acts as the global camera, focus, atmosphere, and audio direction.
Keep output settings out of the prose
Set duration, aspect ratio, and resolution in the interface or API when those controls are available. Do not spend prompt space repeating 16:9 or 720p unless the ratio itself changes the composition you are describing. The official prompt guide explicitly treats those as generation parameters, not required prompt content.[2]
Step 4: schedule long scenes without over-timing them
Seedance 2.5 supports 4-to-30-second base generation in the official guide. Long Video mode accepts a direct duration from 30 to 180 seconds. Extend Video can add up to 30 seconds to a source shorter than 30 seconds, and repeated extension can build a sequence toward 60 seconds.[1]
The reliable way to control that time is to plan states, not cuts.
Practical adapted template: one florist order in four controlled stages
A copy-ready 30-second template that gives each interval one visible state change and a clear handoff into the next stage.
Input — complete prompt
MODE: Base generation · staged timeline
MATERIALS: Optional florist identity and flower-shop scene references
SETTINGS: 30 seconds · 16:9 · 720p

[Generation goal]
A florist receives an online order, assembles the bouquet, packs it, and hands it to a courier.

[0-7s · order received]
Initial state: the florist is alone behind the counter; flowers are sorted in buckets.
The tablet notification arrives and she reads the order.
End state: the tablet sits beside an empty wrapping sheet.

[7-19s · bouquet assembled]
Continue the same florist, apron, counter, and flower layout.
She selects white tulips and orange ranunculus, then ties the stems.
At 19s, one complete bouquet lies centered on the wrapping sheet.

[19-27s · packed]
She wraps the bouquet and adds exactly one card.
Two seconds later, the courier enters from screen-right.

[27-30s · collected]
The handoff completes and the courier exits screen-right.

[Maintain consistency]
One florist, one courier, one bouquet, unchanged clothing, fixed counter direction,
continuous morning light, no subtitles, quiet shop ambience.
Use a range for a time budget, an exact second for a handoff or transition, and relative timing for a short delay. Keep ranges consecutive and non-overlapping. A timestamp is not a guaranteed edit point, and one-second micro-scheduling should be reserved for the moments that truly need it. Asking for three actions in one second does not create precision; it creates omissions.[2]
Step 5: use Smart Edit with the source video as master
The central editing rule is simple: define the source video as the sole master for everything you are not changing. Then name the edit, the target reference, the permitted scope, and the details that must survive.
Practical adapted template: replace one lamp with Smart Edit
A source-led edit prompt that permits one object replacement while protecting the original timeline, performance, camera, lighting, and audio.
Input — complete prompt
MODE: Smart Edit
MATERIALS: @Video 1 source master; @Image 1 replacement lamp
SETTINGS: Source aspect ratio and approximate source duration are locked

[Source]
@Video 1 is the sole master for shot order, duration, camera path, performer motion,
occlusion, lighting progression, room geometry, and original dialogue.

[Target]
@Image 1 defines the replacement desk lamp only: smoked amber glass, brass stem,
black braided cable. Do not inherit its background, table, shadows, or camera angle.

[Edit]
Replace only the single white lamp on the desk with the lamp from @Image 1.
Keep exactly one lamp. Preserve its original position, scale, contact shadow,
switch-on timing, and every other event as closely as possible.

[Exclusions]
Do not change the actor, desk, books, window, camera, dialogue, or color grade.
Do not add a second lamp or move the cable.
That pattern works for product replacement, wardrobe changes, prop removal, background substitution, and selective audio work. The source defines the sequence. The new reference defines only the changed thing. The prompt defines a narrow permission boundary.[2]
For partial removal, identify the object by appearance and position, then describe what should plausibly occupy the cleared area. For spatial perspective changes, state what geometry must stay fixed and which viewing relationship may change. For background replacement, preserve foreground pose, edges, contact, and camera motion. For audio edits, say whether original dialogue, effects, ambience, or music should remain; Dreamina's guide specifically includes background-music separation and removal.[1]
Step 6: extend a clip through a matched boundary state
Extension fails at the seam when the prompt describes only the new event. A good extension prompt first describes the state on both sides of the join.
For a backward extension:
Practical adapted template: backward extension at a display case
A boundary-first extension prompt that defines the new lead-in and the exact source state it must meet at the seam.
Input — complete prompt
MODE: Extend Video · backward
MATERIALS: @Video 1 source; @Image 1 curator; @Image 2 silver brooch
SETTINGS: Add 8 seconds before source · source ratio locked

[Materials]
@Image 1 defines the museum curator's face and navy suit.
@Image 2 defines the silver brooch in the display case.
@Video 1 is the source video.

[Task]
Extend before @Video 1. The final frame of the new segment must connect naturally
to the first source frame.

[New event]
The curator approaches the display case from the rear gallery, pauses, and leans
slightly forward to inspect the brooch.

[Boundary]
At the join, match the curator's pose, head direction, hand position, distance from
the case, brooch placement, reflections, background visitors, composition, light,
camera height, and movement direction shown in @Video 1's first frame.

[Continuity]
This is one continuous curator and one display case. Do not duplicate either.
Any visitor who first appears in the source must not appear early in the extension.
For a forward extension, reverse the boundary: the first generated frame should connect naturally to the source's last frame. A natural match does not mean a pixel-identical still. Review the frames immediately before and after the boundary, then watch the full combined sequence for changes in direction, scale, light, prop ownership, or subject count.[2]
Step 7: control endpoints, keyframes, and storyboard grids
First and last frames
Use two endpoint images when the opening and closing compositions matter more than every intermediate action.
Practical template: first-and-last-frame lantern release
A two-anchor prompt that preserves both endpoint compositions while directing one continuous lighting, release, and tracking action between them.
Input — complete prompt
MODE: First and Last Frames
MATERIALS: @Image 1 first frame · @Image 2 last frame
SETTINGS: 10 seconds · aspect ratio inherited from @Image 1

@Image 1 is the first frame: an unlit paper lantern rests on a dark riverbank.
@Image 2 is the last frame: the same lantern floats downstream, glowing warmly.

Beginning from @Image 1, a hand lights the lantern and releases it onto the water.
The camera tracks low beside it as the current carries it away, ending in the exact
subject placement and broad composition of @Image 2. Preserve one lantern only.
No cuts, no second lantern, and no change of river direction.
Describe each anchor separately. The first image sets the output aspect ratio, so use endpoint images with matching ratios. Additional references may define the hand, lantern material, or river style, but should not override either endpoint composition.[2]
Multi-keyframe sequences
Separate keyframe images are easier to map than a grid:
Practical template: ordered keyframes for product unboxing
A four-image prompt that treats each keyframe as the next visible state of one package and one continuous product action.
Input — complete prompt
MODE: Omni Reference · ordered keyframes
MATERIALS: @Image 1 through @Image 4
SETTINGS: 12 seconds · 16:9 · 720p

Use @Image 1 through @Image 4 as keyframes in that order.
@Image 1: the unopened package is centered on the blue table.
@Image 2: the lid is lifted and the product is first visible.
@Image 3: the same product stands upright beside the open package.
@Image 4: that product fills the final hero composition.

Create natural hand motion and continuous camera movement between these states.
Keep one package and one product. Preserve shape, label, table color, and screen direction.
Keyframes control stage order and major states. They do not guarantee the exact content of every frame.
Storyboard grids
The official prompt guide recommends no more than about 15 clean panels. Simple line art and readable spatial relationships work better than a crowded painted board. State the reading order, then specify action, shot size, camera movement, and transition per panel. Explicitly exclude line art, labels, arrows, panel borders, and placeholder text from the final style.[2]
Practical template: nine-shot storyboard sequence
A storyboard-control prompt that transfers reading order, framing, and shot progression without inheriting sketch graphics or repeated figures.
Input — complete prompt
MODE: Omni Reference · storyboard guidance
MATERIALS: @Image 1 clean 3×3 storyboard
SETTINGS: 30 seconds · 16:9 · 720p

@Image 1 is a 3×3 storyboard read left-to-right, top-to-bottom.
Use it for story order, approximate composition, and shot progression only.

Panels 1–3: wide arrival, medium doorway pause, close-up of the key turning.
Panels 4–6: slow interior track, over-shoulder reveal, reaction close-up.
Panels 7–9: object pickup, fast exit, locked-off final empty room.

Render as live-action 35mm night photography. Keep one protagonist and one object.
Do not reproduce sketch lines, captions, arrows, panel borders, or repeated figures.
Step 8: turn blockouts into finished footage
Dreamina's Clay Renderer workflow is designed for camera-route or blockout exports from Maya and Blender.[1][4] A blockout can control time and space more reliably than prose because it makes the path, staging, occlusion, and lens changes visible.
Use a coarse blockout when you need a motion skeleton. Simple geometry can represent people, props, vehicles, and cameras. The prompt must map each shape to its finished subject and state that gray materials, empty environments, guide lines, and placeholder geometry should not carry into the result.
Practical adapted template: Clay Renderer kitchen blockout
A blockout-transfer prompt that keeps action and camera structure while mapping every proxy shape to the intended finished subject and environment.
Input — complete prompt
MODE: Clay Renderer / Omni Reference
MATERIALS: @Video 1 blockout · @Image 1 chef · @Image 2 tray · @Image 3 kitchen
SETTINGS: Match @Video 1 duration and camera route · 16:9 · 720p

@Video 1 is a coarse blockout. Inherit only action timing, character paths,
blocking, camera movement, cuts, and the direction of the light change.

The tall blue capsule becomes the chef defined by @Image 1.
The small orange cube becomes the serving tray defined by @Image 2.
The gray room becomes the restaurant kitchen defined by @Image 3.

Preserve object paths, handoff timing, occlusion order, lens changes, and cuts.
Do not inherit primitive geometry, flat gray materials, axes, guides, or the empty set.
Use a fine blockout when the model already has complete structures. Clean away path lines, axes, controllers, camera frustums, and rig overlays before uploading. Ask Seedance 2.5 to preserve modeled structure, movement, spatial relationships, camera, and cuts while rerendering materials, colors, characters, environment, and finish.
Step 9: direct audio, dialogue, and subtitles explicitly
The official prompt guide provides four distinct punctuation conventions:[2]
| Audio or text element | Syntax | Example |
|---|---|---|
| Music | Parentheses | (restrained pizzicato strings begin) |
| Sound effect | Angle brackets | <bicycle bell rings once> |
| Spoken dialogue | Curly braces | {The order is ready.} |
| On-screen subtitle | Full-width brackets | 【Open until midnight】 |
When dialogue is not Chinese, specify language, regional variety or accent when relevant, delivery, speaker, and the actual line.
Practical template: one dialogue turn with sound cues
A five-second speaking prompt that assigns the speaker, accent, dialogue, entrance cue, music bed, and unwanted audio in one copyable block.
Input — complete prompt
MODE: Base generation with audio enabled
SETTING: One five-second speaking turn

English, understated Singaporean accent, warm but hurried delivery,
the shop owner says: {Your parcel arrived just before the rain.}

As the customer enters: <door chime rings once>
(soft room-tone synth begins under the dialogue, no percussion)

No subtitles, no narrator, no second speaker, no overlapping music vocal.
Dreamina's guide says 2.5 prioritizes Chinese, English, Spanish, Indonesian, and Malay, and also covers Thai, Arabic, Portuguese, Vietnamese, Japanese, and Korean.[1] That list is about supported speech workflows, not a promise that every accent or mixed-language performance will be equally stable. Keep dialogue short, name the speaker, and do not ask two off-screen voices to overlap unless overlap is essential.
If you do not want generated text or music, say so globally: no subtitles, no captions, no background music; preserve only location ambience and the specified dialogue. This is more reliable than waiting to remove accidental output later.
A complete first-generation workflow
Put the pieces together in this order:
- Define the deliverable. Write one sentence describing where the video will be used, the required duration, and the final visible state.
- Choose the mode. New scene, multimodal reference, edit, long video, extension, or endpoints.
- Trim inputs. Remove irrelevant frames, audio, backgrounds, labels, and duplicate references.
- Assign every material. Character, product, prop, environment, motion, camera, voice, ambience, or music.
- Write one creative summary. Subject, location, event, style, and main camera idea.
- Plan stages. Give each stage one primary state change and a visible end state.
- Add only critical timestamps. Handoffs, arrivals, exits, reveals, transitions, or beats.
- Protect continuity. Identity, subject count, clothing, prop ownership, screen direction, spatial layout, lighting, and audio.
- Set interface parameters. Ratio, documented resolution, and duration where the selected mode allows them.
- Generate and review in passes. First story order, then identity, hands and props, camera, boundary frames, audio, subtitles, and technical output.
The official output-resolution options listed in the Seedance 2.5 user guide are 480p and 720p.[1] Do not assume 1080p or 4K merely because an input can be 4K or because another platform applies its own upscale. Input resolution and generated output resolution are different specifications.
Dreamina limits versus Seedance2.so and API workflows
Dreamina documents the upstream consumer workflow. A third-party studio may expose a smaller subset through a partner API. The limits shown in that studio's uploader and model selector are the limits that apply to that request.
| Surface | What is verified in this guide | What not to assume |
|---|---|---|
| Dreamina Seedance 2.5 | Official 2.5 modes; up to 50 total references; 4–30-second base generation; 30–180-second Long Video | That every account, region, or API has identical controls |
| Seedance2.so current reference workflow | Up to 9 images, 3 videos, and 3 audio files; reference video/audio total up to 15 seconds; common generated duration 4–15 seconds | That Dreamina's 30/10/10 upload ceilings automatically apply |
| Current Seedance API integrations | Released Seedance 2.0 contracts with provider-specific parameters | That an unpublished 2.5 API uses the same model name, price, fields, or limits |
For hands-on work with the released reference workflow, use reference-to-video, video editing, or video extension. The controls beside each uploader show the actual channel limit before you spend credits. The Seedance 2.5 overview is useful for keeping the official 2.5 feature set separate from currently callable tools.
For a product integration, the safest conversion path is to build queueing, callbacks, storage, retries, and prompt versioning against a released endpoint now, then add Seedance 2.5 as a separately tested model when its public API contract is available. Seedance2.so's API overview explains the browser-to-API path, while reAPI's current Seedance 2.0 model page provides a released automation baseline. Do not silently relabel a 2.0 request as 2.5.
Match the workflow to the production job
| Production job | Best mode | References that matter most | First review pass |
|---|---|---|---|
| Product launch shot | Omni Reference | Front, side, material detail, packaging, camera motion | Shape, label colors, subject count |
| Dialogue scene | Base or Omni Reference | Character views and clean voice samples | Speaker identity, turn order, lip timing |
| 60-second narrative | Long Video or staged extension | Character profiles, locations, stage endpoints | State continuity at every stage boundary |
| Replace one prop | Smart Edit | Source video plus one clean target image | All non-target content remains unchanged |
| Add a beginning to a clip | Backward extension | Source plus identity and scene anchors | Pose, direction, lighting, and prop state at seam |
| Designed visual transition | First/last frames or two-video transition | Both boundary compositions | Object correspondence and camera direction |
| Previsualized commercial | Clay Renderer | Clean blockout plus final look references | Structure and camera preserved; guides removed |
| Photo sequence montage | One-click video / storyboard | Ordered images plus style-only rhythm reference | Image order, identity, restrained motion |
For one-click video, do not write only “turn these images into a video.” Define material roles, image order, motion amount, editing rhythm, final visual treatment, and audio. A style-reference clip may define pacing, transitions, subtitle behavior, or music, but exclude its people, products, and locations unless you truly want those inherited.[2]
Pre-export checklist
Before accepting a result, answer each question with a visible observation:
- Does every uploaded reference have one stated role?
- Is each person, product, and prop mapped individually rather than “respectively” across a range of files?
- Does every stage have one main event and a visible end state?
- Are timestamp ranges consecutive, non-overlapping, and physically possible?
- Is the source video named as master for every unedited property?
- Are subject count, clothing, prop ownership, and screen direction stable?
- Do the two sides of every extension or transition boundary agree in pose, composition, light, and motion?
- Are storyboard borders, labels, arrows, blockout geometry, and rig guides excluded?
- Is dialogue assigned to a named speaker with language and delivery?
- Are unwanted subtitles, narration, music, or source-audio changes explicitly forbidden?
- Did you inspect the whole clip, not only the thumbnail and final frame?
- Does the export resolution come from the mode's documented output control rather than an assumption based on input resolution?
If a result fails one item, revise the relevant instruction instead of adding a paragraph of unrelated detail. Smaller, targeted changes make it easier to see which prompt edit actually fixed the shot.
FAQ
Is Seedance 2.5 fully released?
Dreamina's official user guide describes Seedance 2.5 as fully released in its consumer product.[1] That does not establish that every region, account, third-party platform, or developer API exposes the same functions. Verify the live model picker and written API contract for the channel you intend to use.
What is the official website for Seedance 2.5?
Dreamina is the official ByteDance consumer creation surface referenced by the user guide.[3] Seedance2.so is an independent platform, and reAPI is an independent API service; neither should be presented as ByteDance's official site.
How long can Seedance 2.5 generate?
The official guide lists 4–30 seconds for base Seedance 2.5 generation and 30–180 seconds in Long Video mode.[1] A single extension can add up to 30 seconds to an eligible source, with repeated extension supporting longer sequences. Third-party limits may be lower.
Can Seedance 2.5 use 50 references at once?
The official prompt guide states a 50-material overall ceiling, with up to 30 images, 10 videos totaling 30 seconds, and 10 audio files totaling 30 seconds.[2] That is a maximum, not a recommendation. A smaller, role-labeled set is usually easier to control, and the current Seedance2.so Studio exposes a 9-image, 3-video, 3-audio subset.
Does Seedance 2.5 support timestamps?
Yes. Use ranges for stage budgets, an exact second for a critical event, and relative timing for a delay. The official guides warn against overloading the timeline with impossible one-second action lists; timestamps guide event placement but are not guaranteed edit cuts.[1][2]
What resolution does official Dreamina Seedance 2.5 output?
The official user guide lists 480p and 720p output options.[1] Its upload table allows higher-resolution source video, but a 4K input does not prove a 4K generated output. Some third-party tiers may add provider-specific output or upscaling, so check that channel's selector.
Can I edit only one object without regenerating the scene?
Smart Edit is designed for targeted changes. Treat the source video as the master, define the target reference narrowly, name the one permitted change, and list the camera, motion, people, audio, lighting, and background details that must remain. Review nearby occlusion and contact shadows, not just the edited object's appearance.
Does Seedance 2.5 support dialogue in languages other than Chinese?
Yes. The user guide prioritizes Chinese, English, Spanish, Indonesian, and Malay and also lists Thai, Arabic, Portuguese, Vietnamese, Japanese, and Korean coverage.[1] State the language, regional variety or accent when needed, delivery, speaker, and dialogue. Short turns are easier to keep synchronized.
Build one controlled scene before a long production
The fastest way to learn how to use Seedance 2.5 is to prove one controlled scene. Choose the right mode, upload only references with explicit roles, write a one-sentence creative summary, divide the event into visible states, and protect continuity in a final global block. Once that scene holds its identity, camera, props, and audio, reuse the same subject profiles in a longer timeline or edit.
Use official Dreamina when you need the complete consumer feature set described here. Use the current reference studio to practice multimodal role assignment, or prepare an automation layer through the Seedance API overview and a released reAPI model contract. In every channel, confirm the actual selector and request schema first. That discipline matters more than any single trick in a how to use Seedance 2.5 guide.
References
- ByteDance Dreamina. Dreamina Seedance 2.5 User Guide. Retrieved August 2026 from bytedance.larkoffice.com/wiki/NjnWwvf4BiFYFLk2RzrcEgaunGf
- ByteDance Dreamina. Dreamina Seedance 2.5 Prompt Guide. Retrieved August 2026 from bytedance.larkoffice.com/docx/A88jd0B47oAd8zxWp5ycZFMfnxh
- Dreamina. Official AI creation home. Retrieved August 2026 from dreamina.capcut.com/ai-tool/home
- ByteDance Dreamina. Clay Renderer Plugin User Guide. Retrieved August 2026 from bytedance.larkoffice.com/wiki/TrbCwqIZFiblb0kqshZccJ4mndd
Further reading
- Seedance2.so. Current multimodal reference controls. seedance2.so/reference-to-video
- Seedance2.so. Seedance API overview. seedance2.so/seedance-2-api
- reAPI. Released Seedance 2.0 API model. reapi.ai/models/seedance-2-0
Author

Categories
More Posts
Seedance 2.0 face limit: the 3 legit workarounds
Seedance 2.0 refuses real human face uploads. The 3 ByteDance-documented workarounds: pre-set virtual avatars, AI-generated portraits, asset-id authorization.

Higgsfield Alternative: What to Use Instead (2026)
Looking for a Higgsfield alternative? A sourced comparison of pricing, credit expiry, unlimited-mode fine print, and when a focused Seedance studio fits better.

How to Use Seedance 2.0: A Quick Guide to AI Video Generation
Learn how to use Seedance 2.0 to generate videos from text, images, and references. Covers all supported modes including text-to-video, image-to-video, video editing, and beat-sync.